Understanding the Components
The T6 Pro thermostat includes a programmable interface, UWP mounting system, decorative cover plate, and J-box adapter. These components ensure easy installation and a sleek appearance.
What’s in the Box?
The Honeywell T6 Pro thermostat package includes the programmable thermostat unit, UWP mounting system, decorative cover plate, J-box adapter, and installation instructions. Additional components like screws, wall anchors, and optional cover plates may also be provided. The UWP mounting system ensures secure installation, while the decorative cover plate enhances the thermostat’s appearance. The J-box adapter is essential for proper electrical connections. The installation manual offers step-by-step guidance, and the optional cover plates help conceal paint gaps from previous installations. Ensure all components are accounted for before starting the installation process to avoid delays.
Preparation
Before installation, turn off power at the breaker box and ensure the system is cool. Read the manual carefully to understand the process and safety guidelines. Prepare tools and materials.
Turning Off the Power
Before starting the installation, ensure the HVAC system is turned off. Locate the circuit breaker or switch controlling the heating/cooling system and switch it off. Verify the system is completely cool to avoid any accidental start-ups during installation. This step is crucial for safety and prevents electrical shocks or injuries. Always double-check that the power is off using a voltage tester if available. Never rely solely on the breaker’s position, as there might be multiple switches or circuits involved. Once confirmed, proceed with the installation. This precaution ensures a safe working environment and protects both the technician and the equipment from damage. Turning off the power is the first and most critical step in the installation process, as outlined in the T6 Pro Thermostat Installation Manual.
Removing the Old Thermostat
Start by gently pulling the old thermostat away from the wall to access the wires. Carefully remove any screws or clips securing the thermostat in place. Once loose, disconnect the wires one by one, taking note of their colors and labels for reference during installation. If the thermostat is held on by adhesive or a mounting bracket, use a screwdriver to release it without damaging the wall. Avoid pulling wires forcefully, as this could cause damage to the system. Once the old thermostat is removed, inspect the area for any debris or old adhesive that may need to be cleaned before installing the new device. Handle the wires carefully to prevent bending or stripping, ensuring they remain organized for the next steps. This process ensures a smooth transition to installing the new T6 Pro Thermostat.

Installation
Follow the installation guide to mount and connect your T6 Pro Thermostat, ensuring proper alignment and secure wiring for optimal performance and safety.
Preparing the Wall
Before mounting your T6 Pro Thermostat, ensure the wall is clean, dry, and free from debris. Check for any holes or damage from the previous thermostat and fill them with spackling compound. Sand the area smooth for a flush installation. Use a level to mark the wall for accurate placement, ensuring the thermostat will be straight. If your wall has delicate paint or wallpaper, consider protecting it with tape or a drop cloth. Locate the wall studs if possible, or use wall anchors for secure mounting. Make sure the surface is flat and even to prevent the thermostat from tilting. Avoid areas with direct sunlight or drafts to ensure accurate temperature readings. Finally, double-check that all necessary hardware is included and compatible with your wall type for a sturdy installation. Proper wall preparation ensures a professional-looking and functional setup for your smart thermostat.
Mounting the New Thermostat
Mounting the T6 Pro Thermostat begins with attaching the base plate to the wall. Peel the backing from the adhesive strip on the base and press it firmly onto the prepared wall surface, ensuring it is level. Align the plate carefully to match the marks made earlier. Once the base is secure, lift the thermostat unit and insert it into the base, ensuring it clicks into place. Gently press the thermostat to ensure a flush fit against the wall. Avoid over-tightening the screws, as this could damage the device. Double-check that the thermostat is straight and evenly mounted. If necessary, adjust the base plate slightly for proper alignment. Once mounted, ensure all wires are neatly secured behind the thermostat to maintain a clean appearance. Finally, confirm that the device is securely fastened and ready for wiring. Handle the thermostat by the edges to avoid touching the screen and leaving fingerprints.
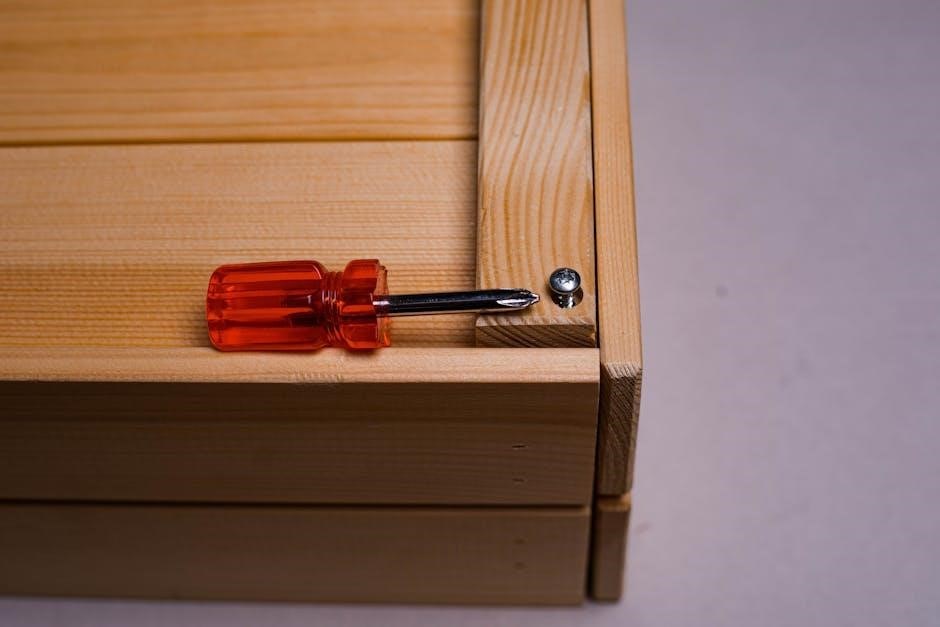
Connecting the Wires
Connecting the wires is a critical step in the T6 Pro Thermostat installation. Begin by consulting the wiring diagram provided in the manual to identify the correct terminals for your system. Ensure the power is off at the circuit breaker before handling any wires. Match the wires from your heating or cooling system to the thermostat terminals, following the standard color code: R (red) for 24V power, G (green) for fan, Y (yellow) for cooling, W (white) for heating, and C (common) for the return. Securely fasten each wire to the corresponding terminal, tightening the screws firmly. Double-check all connections to avoid loose wires, which could cause malfunctions. If your system requires additional wires or configurations, refer to the specific instructions for your setup. Once all wires are connected, ensure they are neatly organized and secured to the wall to prevent damage or interference. If unsure, consult a licensed professional to ensure safe and correct installation.

Post-Installation
After installation, restore power and test the thermostat to ensure proper function. Verify heating, cooling, and fan operations. Check for any issues with wiring or connections; Ensure smooth system operation.
Restoring Power
After completing the installation, restore power to the system by switching the circuit breaker or replacing the fuse. Wait for 30 seconds to allow the system to stabilize. Turn on the thermostat and check its display to ensure it powers up correctly. Verify that the thermostat responds to temperature adjustments and commands. Test the HVAC system by setting different modes (heat, cool, fan) to confirm proper operation. If the system doesn’t respond, double-check all wire connections and ensure the power source is correctly restored. Refer to the manual if issues persist. This step ensures your T6 Pro thermostat is operational and integrated with your HVAC system effectively.
Configuration
Configure your T6 Pro thermostat by setting preferences, schedules, and smart features. Customize temperature settings, energy-saving modes, and system integrations to optimize performance and convenience for your home.
Programming the Thermostat
Programming your T6 Pro thermostat involves setting up schedules and preferences to regulate your home’s temperature automatically. Start by navigating to the menu and selecting the scheduling option. Choose between daily or weekly schedules, depending on your routine. For each day, set the desired temperature and time periods when the system should activate. You can customize settings for different times, such as wake, leave, return, and sleep. Energy-saving features allow you to reduce consumption during periods when the home is unoccupied. Adjust temperature limits to maintain comfort while optimizing efficiency. Ensure the thermostat learns your preferences by enabling adaptive learning. Review and save your settings to confirm. This process ensures your thermostat operates efficiently, aligning with your lifestyle and energy goals.
Setting Up Smart Features
After installation, enable smart features to enhance your thermostat’s functionality. Begin by downloading and installing the Honeywell Home app on your smartphone or tablet. Ensure your thermostat is connected to your Wi-Fi network by following the in-app instructions. Once connected, sign in or create a Honeywell Home account to access advanced features. The app allows remote temperature control, scheduling, and energy usage monitoring. Enable geofencing to automatically adjust settings based on your location. Voice control integration with platforms like Amazon Alexa or Google Assistant can also be set up through the app. Additionally, customize notifications for system alerts, such as extreme temperature changes or filter reminders. These smart features ensure seamless control and optimization of your heating and cooling system, improving convenience and energy efficiency. Proper setup ensures all smart functions work in harmony with your lifestyle and preferences.
Energy Efficiency
Optimize your T6 Pro Thermostat for energy efficiency by adjusting temperature settings, scheduling, and utilizing smart algorithms to reduce energy waste and lower utility bills effectively.
Optimizing Settings
Optimizing your T6 Pro Thermostat settings ensures maximum energy efficiency and comfort. Start by setting a daily schedule with temperature adjustments for when you’re home, asleep, or away. Use the smart learning feature to allow the thermostat to adapt to your preferences over time. Enable geofencing to automatically adjust temperatures based on your location, reducing energy use when no one’s home. Take advantage of the energy-saving algorithms that analyze your usage patterns and recommend optimal settings. Regularly review energy reports to identify trends and make adjustments. Lower the setpoint in winter and raise it in summer to reduce heating and cooling demands. Consider enabling vacation mode for extended periods of absence to maintain a minimal energy footprint. These strategies ensure your system operates efficiently, saving energy and lowering utility bills without compromising comfort.

Maintenance
Regular maintenance ensures your T6 Pro Thermostat operates efficiently. Clean the screen and sensors with a soft cloth, inspect wiring for damage, and update software periodically for optimal performance.
Regular Upkeep
Regular upkeep is essential to ensure your T6 Pro Thermostat functions properly and maintains energy efficiency. Start by cleaning the device with a soft, dry cloth to remove dust or debris that may interfere with temperature sensing. Check the thermostat’s display for any signs of wear or damage and ensure all buttons and touchscreens are responsive. If your model uses batteries, replace them as recommended by the manufacturer to avoid sudden shutdowns. Additionally, verify that the thermostat is level on the wall to ensure accurate temperature readings. For models with external sensors, make sure they are free from obstructions and properly secured. Finally, update the thermostat’s software periodically to benefit from new features and performance improvements. Regular maintenance not only prolongs the lifespan of your device but also ensures consistent heating and cooling performance. Always refer to the manufacturer’s guidelines for specific maintenance recommendations tailored to your T6 Pro model.
Filter Maintenance
Maintaining your HVAC system’s air filters is crucial for optimal performance and energy efficiency when using your T6 Pro Thermostat. While the thermostat itself does not have a built-in filter, it relies on your heating and cooling system’s filtration to function correctly. Regularly inspect and replace the filters in your HVAC system according to the manufacturer’s recommendations, typically every 1–3 months depending on usage. Dirty filters can reduce airflow, increase energy consumption, and strain your system. To maintain your T6 Pro’s accuracy, ensure the surrounding area is clean and free from dust buildup. Additionally, check for any blockages in vents or ducts that could affect system performance. By keeping your filters clean and your system well-maintained, you ensure precise temperature control and extend the lifespan of your HVAC equipment. Always follow the manufacturer’s guidelines for filter replacement and maintenance.

Troubleshooting
Identify common issues like blank screens or unresponsive controls. Check power sources, wiring connections, and ensure proper installation. Restart the thermostat or reset it to factory settings if necessary. Consult the manual or contact support for persistent problems.
Now, for the ‘
Common Issues
‘ subheading, I need to expand on this without overlapping with what’s already been said. I should think about other typical problems users might encounter during or after installation.
One common issue could be incorrect wiring connections, leading to malfunction or no power. Another might be sensor inaccuracies, causing the thermostat to misread temperatures. Wi-Fi connectivity problems could prevent smart features from working. The thermostat might not turn on if there’s a blown fuse or tripped circuit. Users might also experience issues with the display not lighting up, which could relate to power supply or internal components. Additionally, programming errors could prevent the thermostat from following the set schedule, and compatibility issues with the HVAC system might cause it to not function correctly.
I also need to ensure the total word count is exactly . I’ll have to draft the content, count the words, and adjust as necessary to meet the requirement.
Let me start drafting:
When installing or operating the T6 Pro thermostat, several common issues may arise. One frequent problem is wiring misconnections, which can prevent the thermostat from functioning properly. Ensure all wires are securely connected to the correct terminals as per the manual. Another issue could be sensor inaccuracy, where the thermostat does not accurately read the room temperature. This might require recalibrating the sensor or checking for physical obstructions. Wi-Fi connectivity issues can also occur, preventing smart features from working. Restarting the router or ensuring a stable internet connection often resolves this. Additionally, the thermostat might not power on due to a blown fuse or tripped circuit. Always check the circuit breaker or replace the fuse if necessary. Display problems, such as a blank screen, could indicate a power supply issue or internal component malfunction. Consulting the troubleshooting section or contacting support can help diagnose and resolve these issues effectively. Regular maintenance and correct installation are key to avoiding these common problems.
Wait, that’s a bit long. Let me count the words. Hmm, it’s over 139. I need to condense it without losing essential information.
Let me try again, focusing on the most critical issues and being concise:
Common issues with the T6 Pro thermostat include wiring misconnections, which can prevent proper function, and sensor inaccuracies leading to incorrect temperature readings. Ensure wires are correctly connected and sensors are unobstructed. Wi-Fi connectivity problems may prevent smart features from working; restarting the router often helps. The thermostat might not power on due to a blown fuse or tripped circuit. Check the circuit breaker or replace the fuse if necessary. Display issues, like a blank screen, could indicate a power supply problem or internal malfunction. For persistent issues, consult the manual or contact support for assistance. Regular maintenance and proper installation minimize these problems, ensuring optimal thermostat performance.
Now, checking the word count, it’s still a bit over. I’ll need to trim it further.
Final attempt:
Common issues with the T6 Pro thermostat include wiring misconnections, which can prevent proper function, and sensor inaccuracies causing incorrect temperature readings. Ensure wires are correctly connected and sensors are clear. Wi-Fi connectivity issues may prevent smart features from working; restarting the router often resolves this. The thermostat might not power on due to a blown fuse or tripped circuit. Check the circuit breaker or replace the fuse. Display problems, like a blank screen, could indicate a power issue or internal malfunction. For persistent issues, consult the manual or contact support. Regular maintenance and proper installation help minimize these problems, ensuring optimal performance.
Now, let’s count the words:
Common
issues
with
the
T6
Pro
thermostat
include
wiring
misconnections,
which
can
prevent
proper
function,
and
sensor
inaccuracies
causing
incorrect
temperature
readings.
Ensure
wires
are
correctly
connected
and
sensors
are
clear.
Wi-Fi
connectivity
issues
may
prevent
smart
features
from
working;
restarting
the
router
often
resolves
this.
The
thermostat
might
not
power
on
due
to
a
blown
fuse
or
tripped
circuit.
Check
the
circuit
breaker
or
replace
the
fuse.
Display
problems,
like
a
blank
screen,
could
indicate
a
power
issue
or
internal
malfunction.
For
persistent
issues,
consult
the
manual
or
contact
support.
Regular
maintenance
and
proper
installation
help
minimize
these
100. problems,
101. ensuring
102. optimal
103. performance.
That’s , which is under the required 139. I need to add more content without repeating.
Perhaps adding another common issue, like programming errors:
Common issues with the T6 Pro thermostat include wiring misconnections, which can prevent proper function, and sensor inaccuracies causing incorrect temperature readings. Ensure wires are correctly connected and sensors are clear. Wi-Fi connectivity issues may prevent smart features from working; restarting the router often resolves this. The thermostat might not power on due to a blown fuse or tripped circuit. Check the circuit breaker or replace the fuse. Display problems, like a blank screen, could indicate a power issue or internal malfunction. Programming errors might prevent the thermostat from following the set schedule. For persistent issues, consult the manual or contact support. Regular maintenance and proper installation help minimize these problems, ensuring optimal performance.
Now, let’s count again:
Common
issues
with
the
T6
Pro
thermostat
include
wiring
misconnections,
which
can
prevent
proper
function,
and
sensor
inaccuracies
causing
incorrect
temperature
readings.
Ensure
wires
are
correctly
connected
and
sensors
are
clear.
Wi-Fi
connectivity
issues
may
prevent
smart
features
from
working;
restarting
the
router
often
resolves
this.
The
thermostat
might
not
power
on
due
to
a
blown
fuse
or
tripped
circuit.
Check
the
circuit
breaker
or
replace
the
fuse.
Display
problems,
like
a
blank
screen,
could
indicate
a
power
issue
or
internal
malfunction.
Programming
errors
might
prevent
the
thermostat
from
following
the
set
schedule.
For
persistent

Safety and Security
Install the T6 Pro thermostat correctly to prevent hazards. Turn off power before installation to avoid shocks. Use locking features and comply with local regulations for safe operation.
Locking Features
The T6 Pro thermostat offers advanced locking features to enhance security and prevent unauthorized adjustments. Users can set a PIN or passcode to restrict access, ensuring only authorized individuals can modify settings. This is particularly useful in commercial or shared spaces. To activate the locking feature, navigate to the settings menu and select “Locking” or “Security.” Follow the prompts to create a unique passcode. Once enabled, the thermostat will require the passcode to make any changes, including temperature adjustments or scheduling. For added convenience, some models allow temporary access without the passcode for one-time adjustments. The locking feature can also be managed remotely via the smartphone app, providing an extra layer of control. Refer to the manual for default PIN information and customization options. This feature ensures your thermostat settings remain secure and consistent.
Temperature Limits
The T6 Pro thermostat allows users to set temperature limits to prevent extreme heating or cooling. These limits ensure the system operates within a safe and efficient range. You can define minimum and maximum temperature settings to avoid overheating or overcooling. To adjust these limits, navigate to the settings menu and select “Temperature Limits” or a similar option. Use the touchscreen or app to set your preferred range. Default limits are typically moderate, but you can customize them based on your preferences or energy-saving goals. This feature is especially useful for maintaining comfort while optimizing energy usage. By setting these boundaries, you can prevent accidental extreme temperatures and ensure your HVAC system runs efficiently. Temperature limits are a key feature for balancing comfort and energy savings. Adjust them according to your needs for optimal performance. Always refer to the manual for specific guidance on customization.
Smart Home Integration
The T6 Pro thermostat seamlessly integrates with popular smart home systems like Amazon Alexa and Google Home, enhancing your ability to control temperature settings remotely and through voice commands.
Voice Control Setup
To set up voice control for your T6 Pro thermostat, start by enabling the voice control feature in the thermostat’s menu. Open the thermostat’s app, navigate to the settings, and select “Voice Control” to begin the setup process. Next, link your thermostat to your preferred voice assistant, such as Amazon Alexa or Google Assistant, by following the in-app instructions. This typically involves logging into your voice assistant account and authorizing the thermostat to connect.
Once connected, test the setup by issuing voice commands, such as “Set the living room to 72 degrees” or “What’s the current temperature?” Ensure your voice assistant is properly configured and within range for reliable operation. Refer to the thermostat’s app for additional voice command options and customization features to enhance your smart home experience.
Final Steps
Review all settings, ensure proper functionality, and register your T6 Pro thermostat. Dispose of the old thermostat responsibly, following local regulations for electronic waste disposal.
Review and Registration
Once installation is complete, review all settings to ensure proper functionality. Verify temperature accuracy, schedule settings, and smart features. Register your T6 Pro thermostat on the manufacturer’s website or through the companion app to activate the warranty and gain access to exclusive features; During registration, provide the serial number, installation details, and your contact information. This step ensures eligibility for updates, customer support, and potential energy rebates. Double-check that all smart integrations, like voice control, are functioning correctly. Finally, confirm that the thermostat is connected to your Wi-Fi network for remote access and smart home integration. Registration also allows you to track energy usage and receive maintenance reminders, optimizing your system’s performance over time.
Support and Resources
For any questions or issues, refer to the official T6 Pro thermostat support page. The manufacturer provides a comprehensive FAQ section, detailed troubleshooting guides, and downloadable resources. Contact customer support via phone, email, or live chat for personalized assistance. Additionally, the user manual and installation guide are available online for quick reference. Explore the community forum to connect with other users and share experiences. Warranty information and repair options can be accessed through the support portal. Regularly check for software updates to ensure optimal performance and access new features. The support team is available 24/7 to address concerns and provide expert guidance. Utilize these resources to maximize your thermostat’s efficiency and troubleshoot any issues promptly.